Junimo Hut layout in Stardew Valley
Last updated:
Hey guys,
Today I'd like to explain in detail how to make an efficient layout for the Junimo Huts in Stardew Valley.
As a reminder, the Junimo Hut is unlocked in the late game and is used to automate the picking of crops. The building is difficult to make as starfruit is rare, but its massive 17x17 reach radius makes it very useful.
Let's get down to business!
The basic layout
The first thing you'll need to do after placing your Junimo Hut is to make a perfect 5x5 square around it.
You want to replicate your usual iridium sprinkler square:
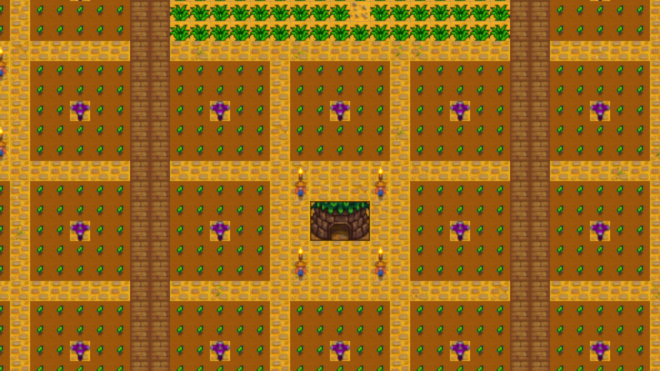
Now, the first thing that you'll notice here is that one scarecrow has been placed on each corner of the four corners of the 5x5 Junimo Hut grid.
By doing so, not only are the workers of the huts able to reach the crops of iridium sprinkler squares placed around them, but every single crop also ends up being protected from crows.
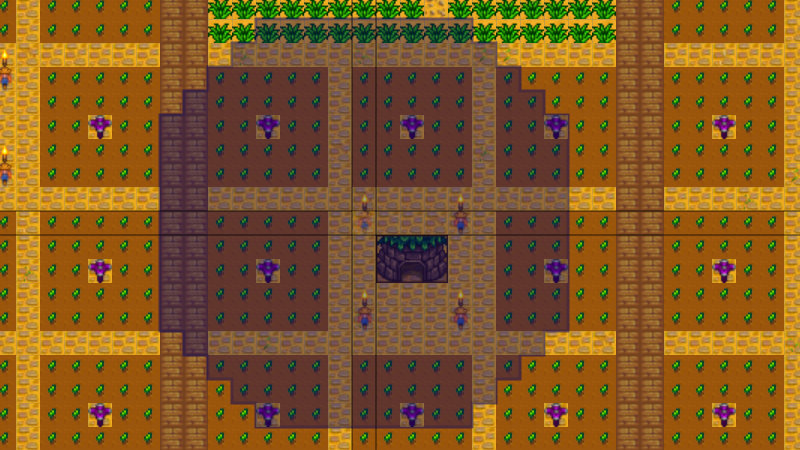
Here is the same picture, but an emphasis on the scarecrow effect:
Tweaking the layout
The above layout will net you 192 crops.
I like adding paths around the huts as well as the iridium sprinkler squares at it makes for an incredibly clean design that is easy to walk around.
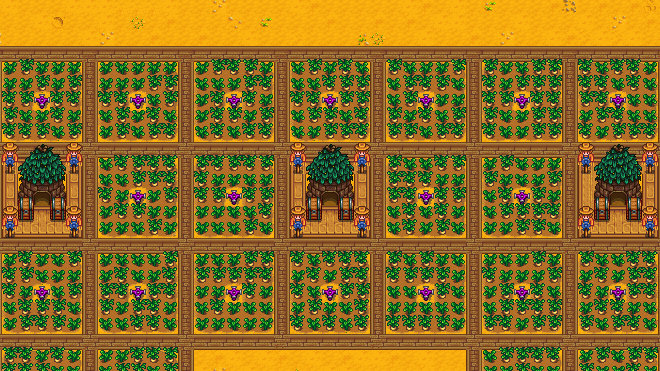
I don't recommend it but you could place additional sprinklers in the corners of those paths if your goal is to optimize every single square for production.
Finally, the remaining space in-between the scarecrows placed around a Junimo Hut is great for chests and lightning.
More Stardew Valley

Fisher or trapper - Stardew Valley

Best Starter Seeds - Stardew Valley

Salmonberry for energy - Stardew Valley

Farm layouts - Stardew Valley

Beach farm layout - Stardew Valley

Rancher or tiller - Stardew Valley

Coopmaster or shepherd in Stardew Valley

Forester or gatherer - Stardew Valley

How to get maple syrup - Stardew Valley

Sprinkler layout for Stardew Valley